The Farmhouse Loaf: Mastering Amish White Bread
There’s something deeply comforting about baking your own bread at home. The smell that fills your kitchen, the warmth of a freshly baked loaf, and the satisfaction of slicing into something you made with your own hands—few things compare. Among the many traditional bread recipes, Amish White Bread stands out as one of the most beloved. Known for its soft, fluffy interior and lightly golden crust, this farmhouse-style loaf is perfect for everyday use.
In this detailed guide, you’ll learn how to master this classic recipe step by step, along with helpful tips to ensure perfect results every time.
Ingredients
To make two standard loaves of Amish white bread, you will need:
- 2 cups warm water (around 43°C / 110°F)
- 2/3 cup granulated sugar
- 1 ½ tablespoons active dry yeast
- 1/4 cup vegetable oil
- 1 ½ teaspoons salt
- 6 cups all-purpose flour (you may need slightly more or less)
Step-by-Step Instructions
1. Activate the Yeast
Begin by pouring the warm water into a large mixing bowl. Add the sugar and stir until it dissolves. Sprinkle the yeast over the surface and let it sit for about 5 to 10 minutes.
You’ll know the yeast is ready when it becomes foamy and bubbly. This step is essential, as it ensures your bread will rise properly.
2. Mix the Dough
Once the yeast is activated, add the vegetable oil and salt to the mixture. Gradually begin adding the flour, one cup at a time, mixing well after each addition.
As the dough starts to come together, it will become thick and slightly sticky. Continue adding flour until the dough pulls away from the sides of the bowl but remains soft to the touch.
3. Knead the Dough
Transfer the dough onto a lightly floured surface and begin kneading. Use the heel of your hand to push the dough away from you, then fold it back over itself and repeat.
Knead for about 8–10 minutes, until the dough becomes smooth, elastic, and slightly springy. Proper kneading develops the gluten, which gives the bread its structure and soft texture.
4. First Rise (Proofing)
Lightly grease a clean bowl with oil and place the dough inside, turning it once so that the surface is coated. Cover the bowl with a clean towel or plastic wrap.
Let the dough rise in a warm, draft-free place for about 1 hour, or until it has doubled in size.
5. Shape the Loaves
After the dough has risen, gently punch it down to release excess air. Transfer it back to a work surface and divide it into two equal portions.
Shape each portion into a loaf by flattening it slightly and rolling it tightly. Place the shaped dough into greased loaf pans.
6. Second Rise
Cover the pans and allow the dough to rise again for 30 to 40 minutes, or until it has risen just above the edges of the pans.
This second rise is important for achieving a light and airy texture.
7. Bake the Bread
Preheat your oven to 180°C (350°F). Place the loaves in the oven and bake for 25–30 minutes, or until the tops are golden brown.
To check if the bread is done, tap the top lightly—if it sounds hollow, it’s ready.
8. Cool and Serve
Remove the bread from the oven and let it cool in the pans for about 10 minutes. Then transfer the loaves to a wire rack to cool completely.
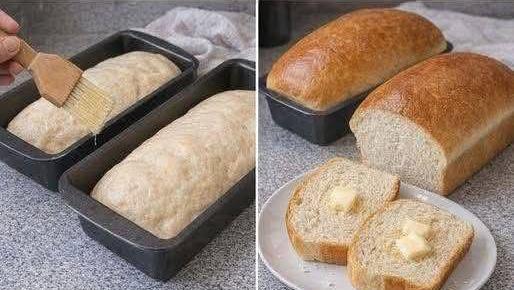
For a softer crust, you can brush the tops with melted butter while they are still warm.
Tips for Perfect Amish White Bread
- Use warm—not hot—water: Hot water can kill the yeast, while cold water won’t activate it properly.
- Don’t over-flour the dough: Too much flour will make the bread dense instead of soft.
- Be patient with rising times: Good bread takes time, and rushing the process can affect the texture.
- Check your yeast freshness: Expired yeast won’t rise properly.
Serving Suggestions
This farmhouse loaf is incredibly versatile:
- Toasted with butter and jam for breakfast
- Used for sandwiches or grilled cheese
- Served alongside soups and stews
- Turned into French toast or bread pudding
Why You’ll Love This Recipe
Amish white bread is cherished for its simplicity and reliability. It uses basic pantry ingredients, requires no special equipment, and consistently delivers soft, delicious results.
Whether you’re new to baking or already experienced, this recipe is a wonderful addition to your kitchen. Once you try it, it may just become your go-to homemade bread.