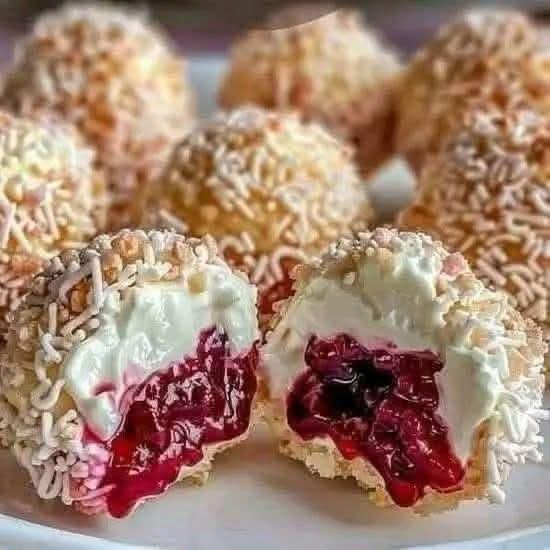
Creamy Cherry Snowball Truffles
No-Bake, Elegant & Melt-in-Your-Mouth Dessert
Experience the irresistible harmony of creamy, fruity, and coconut flavors with these Creamy Cherry Snowball Truffles. These beautiful no-bake treats are as delicious as they are elegant, making them perfect for holidays, parties, special occasions, or whenever you crave a luxurious homemade dessert.
Each truffle features a smooth cream cheese coating, a vibrant cherry-filled center, and a snowy coconut finish that melts gently in your mouth. Best of all, they’re simple to prepare—no oven required!
Why You’ll Love These Cherry Snowball Truffles
- No-Bake Dessert – Perfect for warm days or quick prep
- Creamy & Fruity Balance – Rich cream cheese meets sweet-tart cherries
- Elegant & Eye-Catching – Ideal for gifting and celebrations
- Make-Ahead Friendly – Great for parties and holidays
- Beginner-Friendly – Simple steps, impressive results
Recipe Information
- Recipe Name: Creamy Cherry Snowball Truffles
- Category: No-Bake Desserts
- Cuisine: International
- Prep Time: 30 minutes
- Chill Time: 30–45 minutes
- Total Time: About 1 hour 15 minutes
- Yield: 18–24 truffles
Ingredients
Cream Layer Ingredients
- 1 ½ cups cream cheese, softened
- ½ cup powdered sugar
- 1 teaspoon vanilla extract
- ½ cup whipped cream (or whipped topping)
Cherry Filling Ingredients
- 1 cup cherry jam or cherry pie filling
- 1 tablespoon cornstarch (optional, for thickening)
Coating
- 1 ½ to 2 cups shredded coconut (sweetened or unsweetened)
How to Make Creamy Cherry Snowball Truffles (Step-by-Step)
Step 1: Prepare the Cherry Filling
If your cherry filling is loose, place it in a small saucepan with the cornstarch. Cook over medium heat for 2–3 minutes, stirring constantly, until thickened.
Remove from heat and let cool completely.
Step 2: Make the Creamy Base
In a large bowl, beat the softened cream cheese until smooth. Add powdered sugar and vanilla extract, mixing until fully combined and creamy.
Gently fold in the whipped cream until light and fluffy.
Step 3: Chill the Mixture
Cover the cream mixture and refrigerate for 20–30 minutes until firm enough to handle.
Step 4: Assemble the Truffles
Scoop about 1 tablespoon of the cream mixture and flatten it slightly in your palm.
Add a small teaspoon of cherry filling in the center, then carefully wrap the cream mixture around it to form a ball.
Step 5: Roll in Coconut
Roll each truffle in shredded coconut until fully coated, giving it that signature “snowball” look.
Step 6: Final Chill
Place truffles on a parchment-lined tray and refrigerate for 30–45 minutes until firm.
Tips for Perfect Cherry Truffles
- Chill between steps to make shaping easier
- Don’t overfill with cherry jam to avoid leaks
- Use gloves for neat rolling
- Toast coconut lightly for extra flavor (optional)
- Keep cream cheese fully softened for smooth texture
Storage & Make-Ahead Tips
Refrigerator:
Store in an airtight container for up to 4–5 days.
Freezer:
Freeze for up to 1 month. Thaw in the fridge before serving.
Delicious Variations to Try
- Chocolate Cherry Truffles – Roll in cocoa powder or drizzle with melted chocolate
- Almond Cherry Snowballs – Add finely chopped almonds
- Berry Mix Version – Use raspberry or strawberry filling
- Holiday Style – Add red and green sprinkles
Frequently Asked Questions
Can I use fresh cherries?
Yes! Cook chopped cherries with sugar and cornstarch until thickened.
Are these truffles very sweet?
They’re balanced—sweet but not overpowering. You can reduce powdered sugar if desired.
Can I make them dairy-free?
Use dairy-free cream cheese and coconut whipped cream.
Final Thoughts
These Creamy Cherry Snowball Truffles are proof that no-bake desserts can be both simple and luxurious. With their creamy texture, fruity center, and snowy coconut finish, they’re guaranteed to steal the spotlight at any gathering.