No-Bake Peanut Butter Pretzel Clusters (Easy Sweet & Salty Treat)
Overview
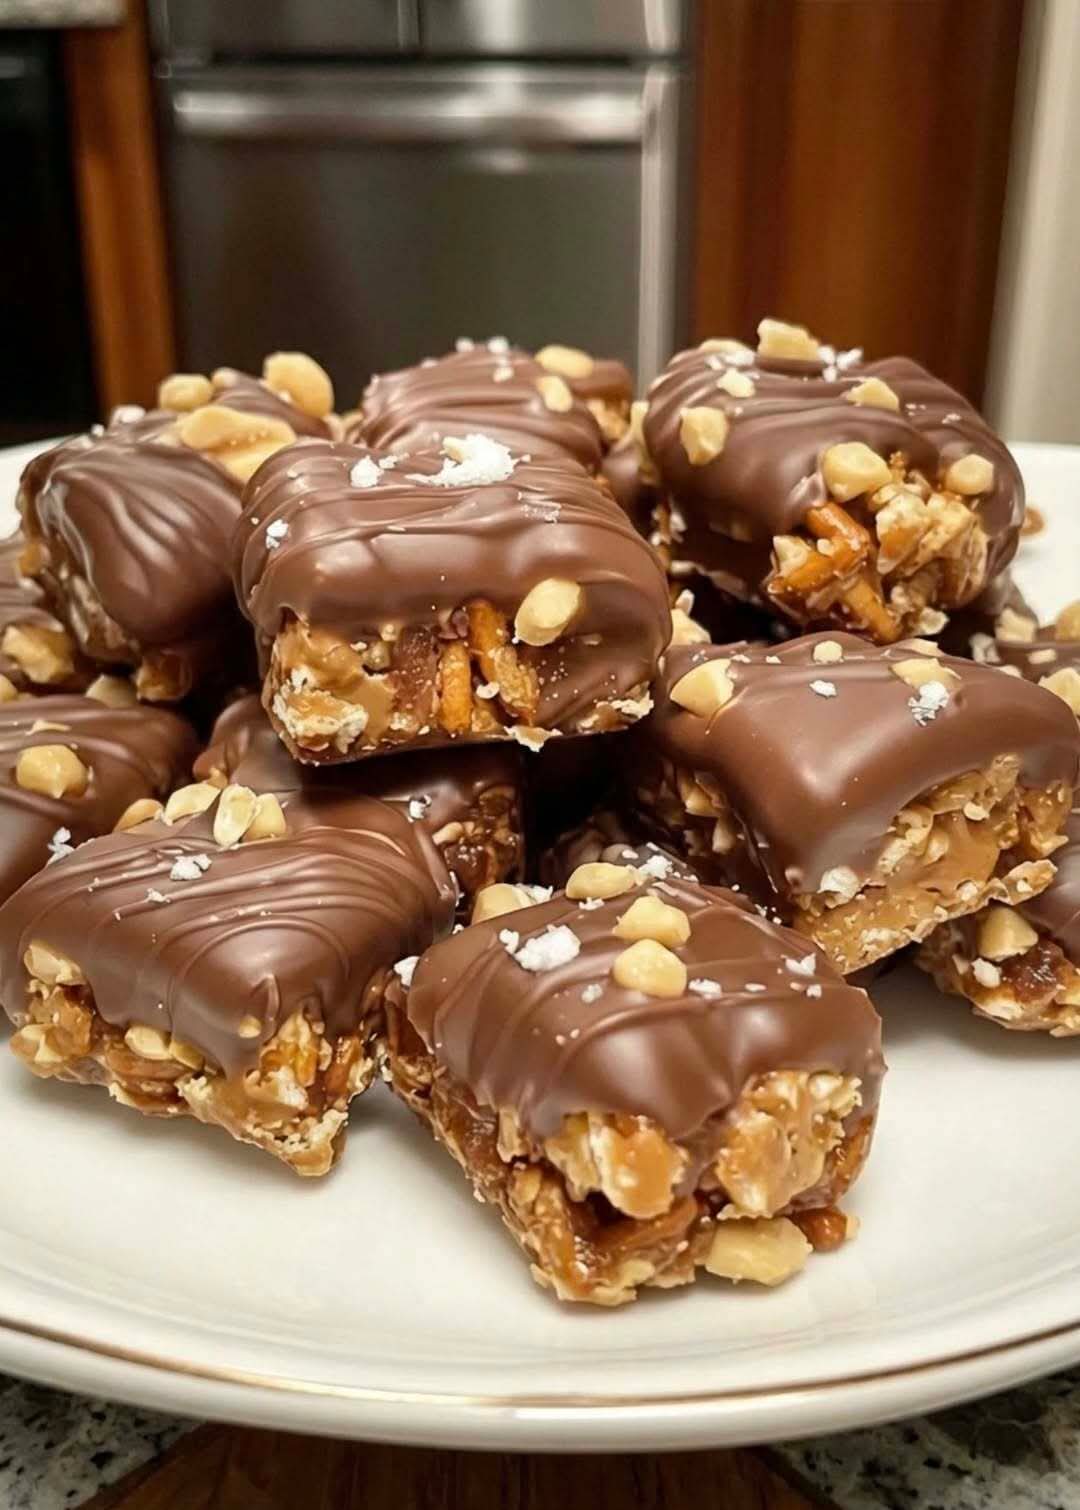
No-Bake Peanut Butter Pretzel Clusters are a quick, delicious treat that perfectly balances sweet, salty, crunchy, and creamy textures. Made with simple pantry ingredients and no oven required, this recipe is ideal for beginners, busy days, or when you need a last-minute dessert.
The combination of crispy pretzels, smooth peanut butter, and rich melted chocolate creates irresistible bite-sized clusters that are perfect for sharing, gifting, or enjoying as a snack.
Ingredients
- 2 cups mini pretzels (or roughly crushed regular pretzels)
- 1 cup creamy peanut butter
- 2 cups chocolate chips (milk, dark, or white chocolate)
- 1 tablespoon coconut oil or butter (optional, for smoother melting)
- ½ teaspoon vanilla extract (optional, for extra flavor)
- Sea salt flakes (optional, for topping)
Equipment Needed
- Large mixing bowl
- Microwave-safe bowl
- Spatula or wooden spoon
- Baking sheet or tray
- Parchment paper or silicone baking mat
- Spoon or cookie scoop
Step-by-Step Instructions
Step 1: Prepare the Baking Surface
Begin by lining a large baking sheet with parchment paper or a silicone baking mat. This prevents sticking and makes it easier to remove the clusters once they are fully set.
Make sure your surface is flat so the clusters hold their shape properly.
Step 2: Prepare the Pretzels
Add the pretzels to a large mixing bowl. If you are using larger pretzels, gently crush them into bite-sized pieces. Avoid crushing them too finely—you want to keep some texture and crunch in every bite.
Step 3: Mix with Peanut Butter
Add the peanut butter to the bowl of pretzels. Stir well until the pretzels are lightly coated. The peanut butter helps bind the clusters together and adds a creamy, rich flavor that complements the salty pretzels.
Step 4: Melt the Chocolate
Place the chocolate chips in a microwave-safe bowl. Heat in 20–30 second intervals, stirring between each interval until the chocolate is fully melted and smooth.
If desired, add coconut oil or butter before melting to create a shinier and smoother consistency.
Important Tip:
Chocolate—especially white chocolate—can burn easily. If the chocolate looks almost melted, stop microwaving and continue stirring. The residual heat will finish melting it without overheating.
Step 5: Combine the Mixture
Pour the melted chocolate over the pretzel and peanut butter mixture. Using a spatula, gently fold everything together until all the pretzels are evenly coated in chocolate.
Take your time with this step to ensure every piece is covered, which helps the clusters hold together once they set.
Step 6: Form the Clusters
Using a spoon or cookie scoop, drop heaping spoonfuls of the mixture onto the prepared baking sheet.
Space them slightly apart to prevent sticking. You can leave them rustic or gently shape them for a more uniform appearance.
Step 7: Add Finishing Touches
While the chocolate is still soft, sprinkle a pinch of sea salt flakes over each cluster. This enhances the flavor by adding a subtle contrast to the sweetness of the chocolate and peanut butter.
Step 8: Chill Until Set
Place the baking sheet in the refrigerator for at least 1 hour, or in the freezer for about 20 minutes.
The clusters are ready when they are firm, fully set, and slightly crisp when you bite into them.
Step 9: Serve and Store
Serve the clusters chilled or at room temperature.
Store leftovers in an airtight container in the refrigerator for up to 1 week. For longer storage, you can freeze them and thaw slightly before eating.
Tips for Best Results
- Use high-quality chocolate for better taste and texture.
- Do not overheat the chocolate to avoid grainy or burnt texture.
- Keep clusters small for easier serving and better portion control.
- Work quickly once the chocolate is mixed, as it will start to set.
Variations and Add-Ins
- Add chopped nuts such as almonds, peanuts, or cashews for extra crunch.
- Mix in mini marshmallows for a chewy texture.
- Drizzle white or dark chocolate on top for decoration.
- Add caramel bits for a richer, dessert-style version.
- Sprinkle crushed cookies or toffee pieces for extra flavor.
Serving Suggestions
These clusters are perfect for:
- Holiday dessert trays
- Party snacks
- Homemade edible gifts
- Movie night treats
- Quick sweet cravings
Storage Tips
- Refrigerator: Store in an airtight container for up to 7 days
- Freezer: Store for up to 2 months
- Room temperature: Only if your kitchen is cool (otherwise they may soften)