
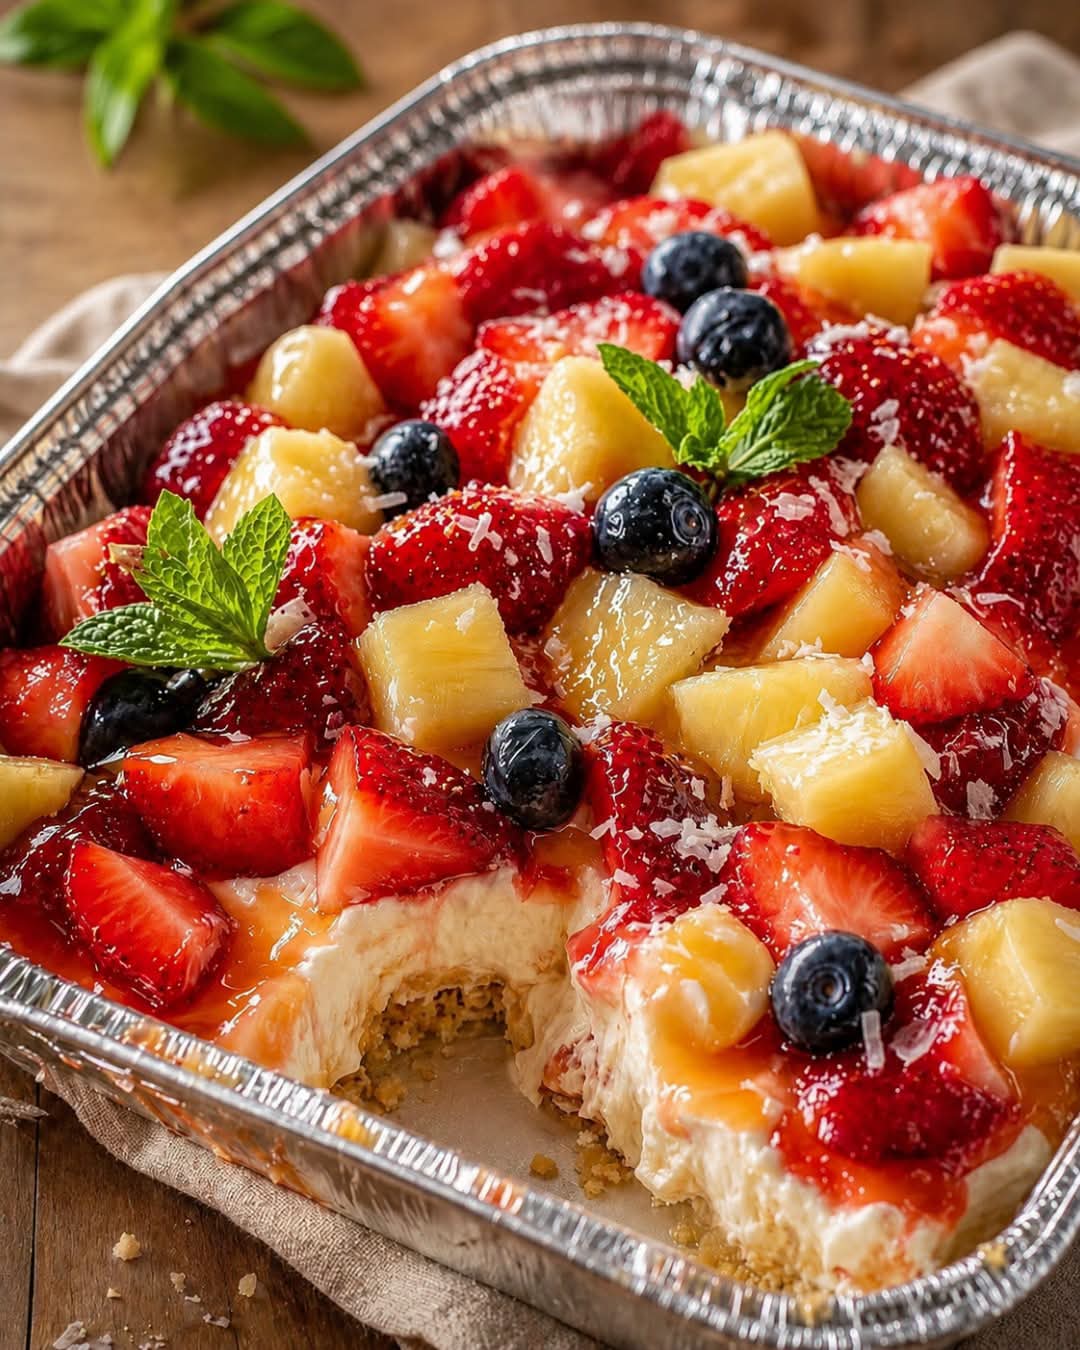
Cheesecake Fruit Salad in Tin Foil Tray: The Ultimate Creamy Dessert for Parties and Gatherings
If you’re searching for an easy, delicious, and crowd-pleasing dessert, this Cheesecake Fruit Salad in a Tin Foil Tray is the perfect recipe. It combines the rich, creamy flavor of cheesecake with a colorful mix of fresh fruit, creating a refreshing dessert that’s ideal for birthdays, family gatherings, potlucks, barbecues, baby showers, holiday celebrations, church events, and summer parties. Serving it in a disposable tin foil tray makes transportation simple and cleanup effortless, making it one of the best desserts for feeding a large group.
Unlike traditional cheesecake, this no-bake fruit salad requires very little preparation and no oven time. The smooth cheesecake filling coats every piece of fruit, creating a light yet indulgent dessert that both kids and adults will enjoy. Whether you’re making dessert for ten people or fifty, this recipe is easy to double and always disappears quickly.
Why You’ll Love This Cheesecake Fruit Salad
There are many reasons why this recipe has become a favorite for home cooks. It is quick to prepare, requires only simple ingredients, and can be customized with your favorite seasonal fruits. Because it’s served cold, it’s especially refreshing during warm weather, but it’s just as popular during Thanksgiving, Christmas, Easter, and other holiday celebrations.
Some of the biggest advantages include:
- No baking required.
- Ready with simple pantry ingredients.
- Perfect for large gatherings.
- Easy to transport in a disposable foil tray.
- Beautiful presentation with colorful fresh fruit.
- Creamy, sweet, and refreshing flavor.
- Easy to prepare ahead of time.
- Budget-friendly for feeding a crowd.
Ingredients
For the Cheesecake Filling
- 16 ounces cream cheese, softened
- 1 cup powdered sugar
- 1 teaspoon vanilla extract
- 2 cups whipped topping or freshly whipped cream
- 1 tablespoon lemon juice (optional)
Fresh Fruit
- 2 cups strawberries, sliced
- 2 cups blueberries
- 2 cups green grapes, halved
- 2 cups red grapes, halved
- 2 cups pineapple chunks
- 2 cups mandarin oranges, drained
- 2 kiwi fruits, peeled and sliced
- 2 bananas, sliced just before serving
Optional Toppings
- Crushed graham crackers
- White chocolate chips
- Mini marshmallows
- Chopped pecans or walnuts
- Sweetened coconut flakes
- Fresh mint leaves
Equipment You’ll Need
Preparing this dessert doesn’t require any special kitchen tools. You’ll simply need:
- A large mixing bowl
- Electric hand mixer or stand mixer
- Rubber spatula
- Sharp knife
- Cutting board
- Measuring cups
- Large disposable tin foil tray
- Plastic wrap or aluminum foil
Step-by-Step Instructions
Step 1: Prepare the Cheesecake Filling
Place the softened cream cheese into a large mixing bowl. Beat it using an electric mixer until completely smooth and creamy with no lumps remaining.
Add the powdered sugar and vanilla extract, then continue mixing until fully combined. If using lemon juice, add it now to brighten the flavor.
Fold the whipped topping into the mixture using a rubber spatula. Stir gently until the filling becomes light, fluffy, and smooth.
Step 2: Prepare the Fruit
Wash all fresh fruit thoroughly under cold water. Pat everything completely dry using paper towels because excess moisture can thin the cheesecake mixture.
Slice the strawberries, halve the grapes, peel and slice the kiwi, drain the mandarin oranges, and cut the pineapple into bite-sized pieces if necessary.
Leave the bananas until the very end so they stay fresh and don’t turn brown.
Step 3: Mix Everything Together
Add the strawberries, grapes, blueberries, pineapple, kiwi, and mandarin oranges into the cheesecake filling.
Fold everything together gently until every piece of fruit is evenly coated with the creamy cheesecake mixture. Avoid stirring too aggressively, as delicate fruits may break apart.
Step 4: Fill the Tin Foil Tray
Transfer the finished fruit salad into a large disposable aluminum tin foil tray.
Spread the mixture evenly with a spatula to create a smooth surface.
Step 5: Refrigerate
Cover the tray tightly with plastic wrap.
Refrigerate for at least 2 to 4 hours before serving. Chilling allows the flavors to blend together and gives the cheesecake filling a thicker, creamier consistency.
Step 6: Garnish Before Serving
Just before serving, add the sliced bananas.
Top with crushed graham crackers, white chocolate chips, chopped nuts, coconut flakes, or fresh mint for extra texture and flavor.
Tips for the Best Cheesecake Fruit Salad
Always use fresh fruit whenever possible. Fresh fruit provides the best texture and prevents excess liquid from collecting in the tray.
Dry all fruit completely after washing. Water left on the fruit can make the cheesecake filling watery.
Avoid overmixing the fruit to keep everything looking fresh and colorful.
Add bananas only when you’re ready to serve to prevent browning.
For extra cheesecake flavor, sprinkle crushed graham crackers over the top just before serving.
Best Fruits to Use
Almost any fresh fruit works well in this recipe. Popular choices include:
- Strawberries
- Blueberries
- Blackberries
- Raspberries
- Grapes
- Pineapple
- Mango
- Kiwi
- Mandarin oranges
- Apples
- Pears
- Cherries
- Peaches
- Nectarines
Mix different colors to create a beautiful presentation.
Serving Suggestions
This dessert pairs perfectly with many occasions.
Serve it at:
- Birthday parties
- Baby showers
- Bridal showers
- Graduation parties
- Summer cookouts
- Barbecues
- Potluck dinners
- Family reunions
- Church gatherings
- Holiday celebrations
- Picnics
- School events
It also makes a refreshing dessert after grilled chicken, burgers, barbecue ribs, or sandwiches.
Storage Instructions
Store leftover Cheesecake Fruit Salad covered in the refrigerator for up to three days.
If the fruit releases a little liquid, simply stir gently before serving.
This dessert is not recommended for freezing because cream cheese and fresh fruit lose their texture after thawing.
Frequently Asked Questions
Can I prepare Cheesecake Fruit Salad the night before?
Yes. Preparing it one day ahead actually allows the flavors to develop. Wait until serving time before adding bananas and crunchy toppings.
What size tin foil tray should I use?
A standard 9×13-inch disposable aluminum tray is ideal for most family gatherings. For larger parties, use a full-size catering tray.
Can I make this recipe healthier?
Yes. Use light cream cheese, reduced-fat whipped topping, and increase the amount of fresh fruit for a lighter version.
Can I use frozen fruit?
Fresh fruit is highly recommended. Frozen fruit often becomes soft and releases excess liquid after thawing, which may make the cheesecake mixture watery.
Can I use homemade whipped cream?
Absolutely. Fresh homemade whipped cream creates an even richer flavor and softer texture than frozen whipped topping.
Final Thoughts
Cheesecake Fruit Salad in a Tin Foil Tray is one of the easiest no-bake desserts you can make for a crowd. With its creamy cheesecake filling, vibrant assortment of fresh fruit, and simple preparation, it’s the perfect combination of flavor, color, and convenience. Whether you’re hosting a holiday dinner, backyard barbecue, birthday celebration, or casual family gathering, this dessert is guaranteed to impress your guests.
Prepare it ahead of time, chill until serving, and enjoy a refreshing, creamy dessert that looks beautiful, tastes incredible, and disappears quickly from the table. Once you try this recipe, it will become one of your favorite desserts for every special occasion throughout the year.