Sheet Pan Crunchwrap: Easy Turkey Bacon and Chicken Ham Delight
If you are looking for a quick, crispy, cheesy, and satisfying meal that feels restaurant-quality but is incredibly easy to make at home, this Sheet Pan Crunchwrap with Turkey Bacon and Chicken Ham is the perfect recipe for you. It combines juicy seasoned chicken, smoky turkey bacon, flavorful chicken ham, melted cheese, and crunchy tortillas baked together in one large sheet pan meal.
This recipe is ideal for busy weeknights, family dinners, game nights, weekend lunches, or even meal prep. The best part is that it is made in the oven, which means less mess, less effort, and more flavor.
Whether you are a fan of wraps, quesadillas, or crispy baked sandwiches, this giant crunchwrap will quickly become one of your favorite comfort foods.
What Is a Sheet Pan Crunchwrap?
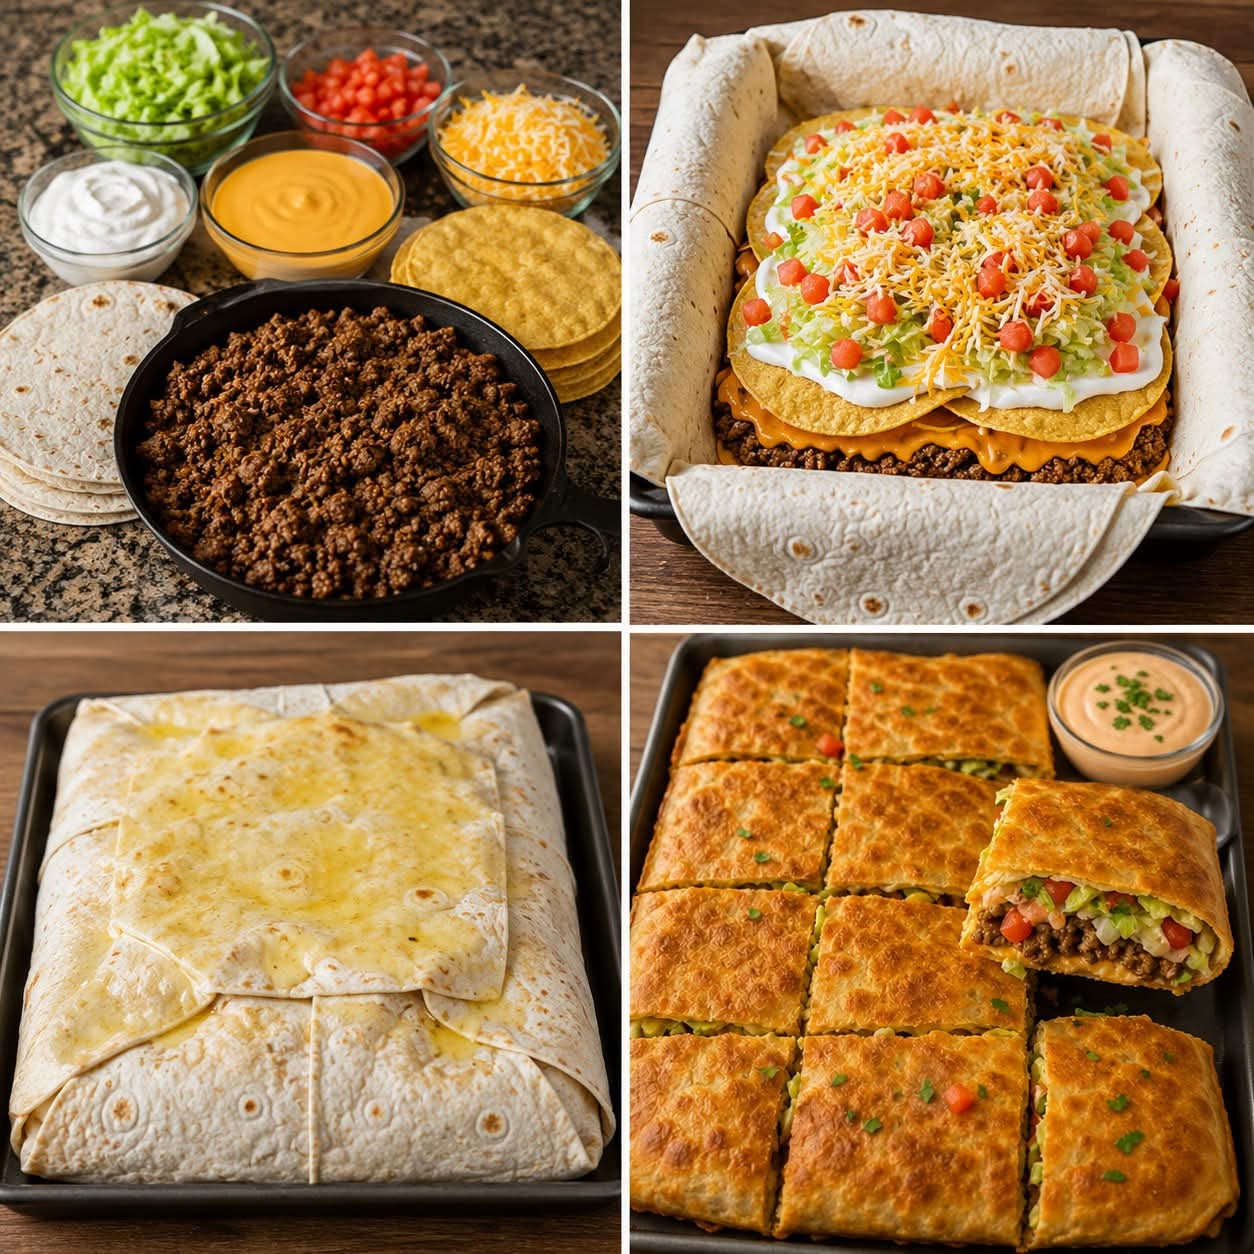
Crunchwrap is a popular layered tortilla meal filled with meat, cheese, vegetables, and sauces, then folded and toasted until crispy. Traditionally, crunchwraps are made individually in a pan, but this sheet pan version is much easier because you can prepare one giant crunchwrap for the entire family at once.
The outside becomes perfectly golden and crunchy while the inside stays cheesy, warm, and packed with flavor.
This version uses turkey bacon and chicken ham instead of pork products, making it a delicious halal-friendly option while still delivering amazing taste and texture.
Why You Will Love This Recipe
There are so many reasons why this recipe is worth trying:
- Crispy on the outside and cheesy on the inside
- Easy to prepare with simple ingredients
- Perfect for feeding a crowd
- Great for lunch or dinner
- Customizable with your favorite toppings
- Family-friendly and kid-approved
- Ready in less than an hour
- Uses only one sheet pan
The combination of melted cheese, seasoned chicken, turkey bacon, and crunchy tortillas creates a flavor that tastes like something from your favorite fast-food restaurant, but even better because it is homemade.
Ingredients
For the Chicken Filling
- 2 large chicken breasts, diced into small cubes
- 1 tablespoon olive oil
- 1 teaspoon paprika
- 1 teaspoon garlic powder
- 1/2 teaspoon black pepper
- 1/2 teaspoon onion powder
- Salt to taste
For the Meat Layer
- 6 slices turkey bacon
- 6 slices chicken ham
For the Vegetables
- 1 small onion, thinly sliced
- 1 green bell pepper, sliced
- 1 tomato, diced
- Shredded lettuce for serving
For the Cheese Layer
- 2 cups shredded cheddar cheese
- 1 cup mozzarella cheese
- Cheese sauce or nacho cheese
For Assembly
- 6 large flour tortillas
- 2 smaller tortillas for the center
- Mayonnaise
- Ketchup
- Mustard (optional)
- Butter or olive oil for brushing
Kitchen Equipment You Need
One of the best things about this recipe is that it does not require special equipment.
You only need:
- A large sheet pan or baking tray
- A frying pan
- A knife and cutting board
- A spatula
- An oven
Simple tools, easy preparation, and incredible results.
Step-by-Step Instructions
Step 1: Prepare the Chicken
Start by heating olive oil in a large skillet over medium heat.
Add the diced chicken breast and season it with:
- Paprika
- Garlic powder
- Onion powder
- Black pepper
- Salt
Cook the chicken for about 7–10 minutes, stirring occasionally until fully cooked and lightly golden.
The seasoning gives the chicken a smoky and savory flavor that works perfectly with the turkey bacon and cheese.
Once cooked, remove the chicken from the pan and set aside.
Step 2: Cook the Turkey Bacon and Chicken Ham
In the same skillet, cook the turkey bacon until slightly crispy.
Then add the chicken ham and cook for another 1–2 minutes.
This step adds a rich, smoky flavor to the crunchwrap. The turkey bacon becomes crispy while the chicken ham stays juicy and flavorful.
After cooking, place them on a plate lined with paper towels to remove excess oil.
Step 3: Sauté the Vegetables
Using the same pan again helps keep all the flavors together.
Add the sliced onions and green bell peppers. Cook them for about 4–5 minutes until soft and slightly caramelized.
The vegetables add freshness, sweetness, and texture to balance the cheesy filling.
Step 4: Prepare the Baking Tray
Preheat your oven to 400°F (200°C).
Lightly grease a large sheet pan with olive oil or line it with parchment paper.
Now place the large tortillas around the tray so they overlap each other. Leave part of each tortilla hanging over the edges because you will fold them over later.
Make sure the center is fully covered.
Step 5: Build the Crunchwrap Layers
Now comes the fun part: layering everything together.
Start with:
- A thin layer of cheese sauce
- Cooked chicken
- Turkey bacon
- Chicken ham
- Sautéed onions and peppers
- Shredded cheddar and mozzarella cheese
You can also add extra ingredients like:
- Jalapeños
- Corn
- Black beans
- Hot sauce
- Pickles
Once all the fillings are added, place the smaller tortillas in the center to help seal everything.
Step 6: Fold the Tortillas
Carefully fold the hanging tortilla edges toward the center.
The goal is to completely cover the filling.
Brush the top lightly with melted butter or olive oil. This helps create a crispy golden crust during baking.
Step 7: Bake Until Crispy
Place the sheet pan crunchwrap in the preheated oven.
Bake for 15–20 minutes or until:
- The top is golden brown
- The tortillas become crispy
- The cheese is melted and bubbly
Your kitchen will smell absolutely amazing at this point.
Step 8: Let It Rest and Slice
Remove the crunchwrap from the oven and let it rest for about 5 minutes.
This helps the cheese settle and makes slicing easier.
Use a sharp knife or pizza cutter to cut into squares or triangles.
Serve warm for the best texture and flavor.
Serving Suggestions
This crunchwrap pairs perfectly with many side dishes.
Here are some delicious serving ideas:
- French fries
- Sweet potato wedges
- Fresh salad
- Garlic sauce
- Ranch dressing
- Spicy mayo
- Coleslaw
- Pickles
You can also serve it with cold soft drinks or homemade lemonade.
Tips for the Best Sheet Pan Crunchwrap
Use Large Tortillas
Large tortillas are important because they help fully wrap the filling without breaking.
Do Not Overfill
Adding too much filling can make folding difficult and may cause the crunchwrap to open while baking.
Use Two Types of Cheese
Combining cheddar and mozzarella gives both flavor and stretchiness.
Bake Until Golden
The crispier the tortilla, the better the crunch.
Delicious Variations
One of the best things about this recipe is how customizable it is.
You can easily change the ingredients based on your preferences.
Spicy Version
Add jalapeños, chili flakes, or spicy sauce.
BBQ Version
Mix BBQ sauce with the chicken filling.
Extra Cheesy Version
Add cream cheese or extra mozzarella.
Vegetarian Version
Replace the meat with mushrooms, beans, or grilled vegetables.
Storage and Reheating
How to Store
Keep leftovers in an airtight container in the refrigerator for up to 3 days.
How to Reheat
For the best crispy texture, reheat in the oven or air fryer instead of the microwave.
Frequently Asked Questions
Can I make it ahead of time?
Yes. You can assemble the crunchwrap earlier in the day and bake it later.
Can I freeze it?
Yes. Wrap slices individually and freeze for up to 2 months.
Can I use different meats?
Absolutely. Ground beef, turkey, grilled chicken, or sausage all work well.
Final Thoughts
This Sheet Pan Crunchwrap with Turkey Bacon and Chicken Ham is everything you want in a comfort meal: crispy, cheesy, flavorful, and incredibly satisfying.
It is easy enough for beginners but delicious enough to impress family and friends. The combination of crunchy tortillas, juicy chicken, smoky turkey bacon, melted cheese, and fresh vegetables creates the perfect bite every single time.
Once you try this recipe, it may become one of your favorite homemade meals for lunch, dinner, parties, or weekend treats.