Mother’s Refrigerator Rolls (Soft, Fluffy, Make-Ahead Dinner Rolls Recipe)
Introduction
There’s something truly special about homemade bread, and these Mother’s Refrigerator Rolls are a timeless classic that never goes out of style. This recipe has been loved for generations because it combines rich flavor, soft texture, and the convenience of preparing the dough ahead of time. Unlike many bread recipes that require immediate baking, this dough can rest in the refrigerator for hours—or even overnight—allowing the flavors to develop beautifully while fitting perfectly into your schedule.
These rolls come out light, airy, and incredibly soft on the inside, with a golden, buttery finish on the outside. Whether you’re making them for a holiday dinner, Sunday family meal, or just to enjoy fresh homemade bread during the week, this recipe is guaranteed to become a favorite in your kitchen.
Ingredients
To make these delicious refrigerator rolls, gather the following ingredients:
- 2 packages active dry yeast
- 1 large egg, beaten with a fork
- 3/4 teaspoon salt
- 1/2 cup plus 1 tablespoon granulated sugar
- 1/2 cup warm water (about 105–110°F / 40–43°C, not too hot)
- 1/2 cup shortening (such as Crisco or lard)
- 2 cups warm water (not hot)
- 6 cups all-purpose flour (or bread flour for a slightly chewier texture)
- 2 sticks margarine or butter (for dipping and brushing)
Step-by-Step Instructions
Step 1: Activate the yeast
Start by dissolving the yeast in 1/2 cup of warm water. Let it sit for 5–10 minutes until it becomes foamy. This step is essential because it confirms that your yeast is active and will help the dough rise properly.
Step 2: Prepare the base mixture
In a large mixing bowl, combine the sugar, salt, shortening, and 2 cups of warm water. Stir until the shortening softens and begins to melt slightly. Then add the beaten egg and mix until everything is well combined.
Step 3: Add the yeast mixture
Pour the activated yeast into the bowl with the wet ingredients. Stir gently to incorporate all the components evenly.
Step 4: Incorporate the flour
Gradually add the flour, one cup at a time, mixing thoroughly after each addition. Continue until a soft dough forms. The dough should be slightly sticky but still manageable.
Step 5: Knead the dough
Transfer the dough onto a lightly floured surface and knead for about 8–10 minutes. Kneading develops the gluten, which gives the rolls their soft and elastic texture. The dough should become smooth and slightly springy to the touch.
Step 6: Refrigerate the dough
Place the dough into a greased bowl, cover it tightly with plastic wrap or a lid, and refrigerate for at least 4 hours or overnight. This slow, cold fermentation improves both the flavor and texture of the rolls.
Shaping and Baking the Rolls
Step 7: Shape the dough
Remove the dough from the refrigerator and punch it down to release excess air. Divide it into equal portions and shape each piece into a smooth ball or your preferred roll shape.
Step 8: Dip in butter
Melt the butter or margarine. Dip each dough ball into the melted butter, ensuring it is well coated, then place it into a greased baking dish.
Step 9: Second rise
Cover the rolls with a clean towel and let them rise in a warm place for 1–2 hours, or until they double in size. This second rise is key to achieving light and fluffy rolls.
Step 10: Bake
Preheat your oven to 350°F (175°C). Bake the rolls for 15–20 minutes, or until they are golden brown on top.
Step 11: Final butter brush
As soon as the rolls come out of the oven, brush them with additional melted butter for extra flavor and a beautiful glossy finish.
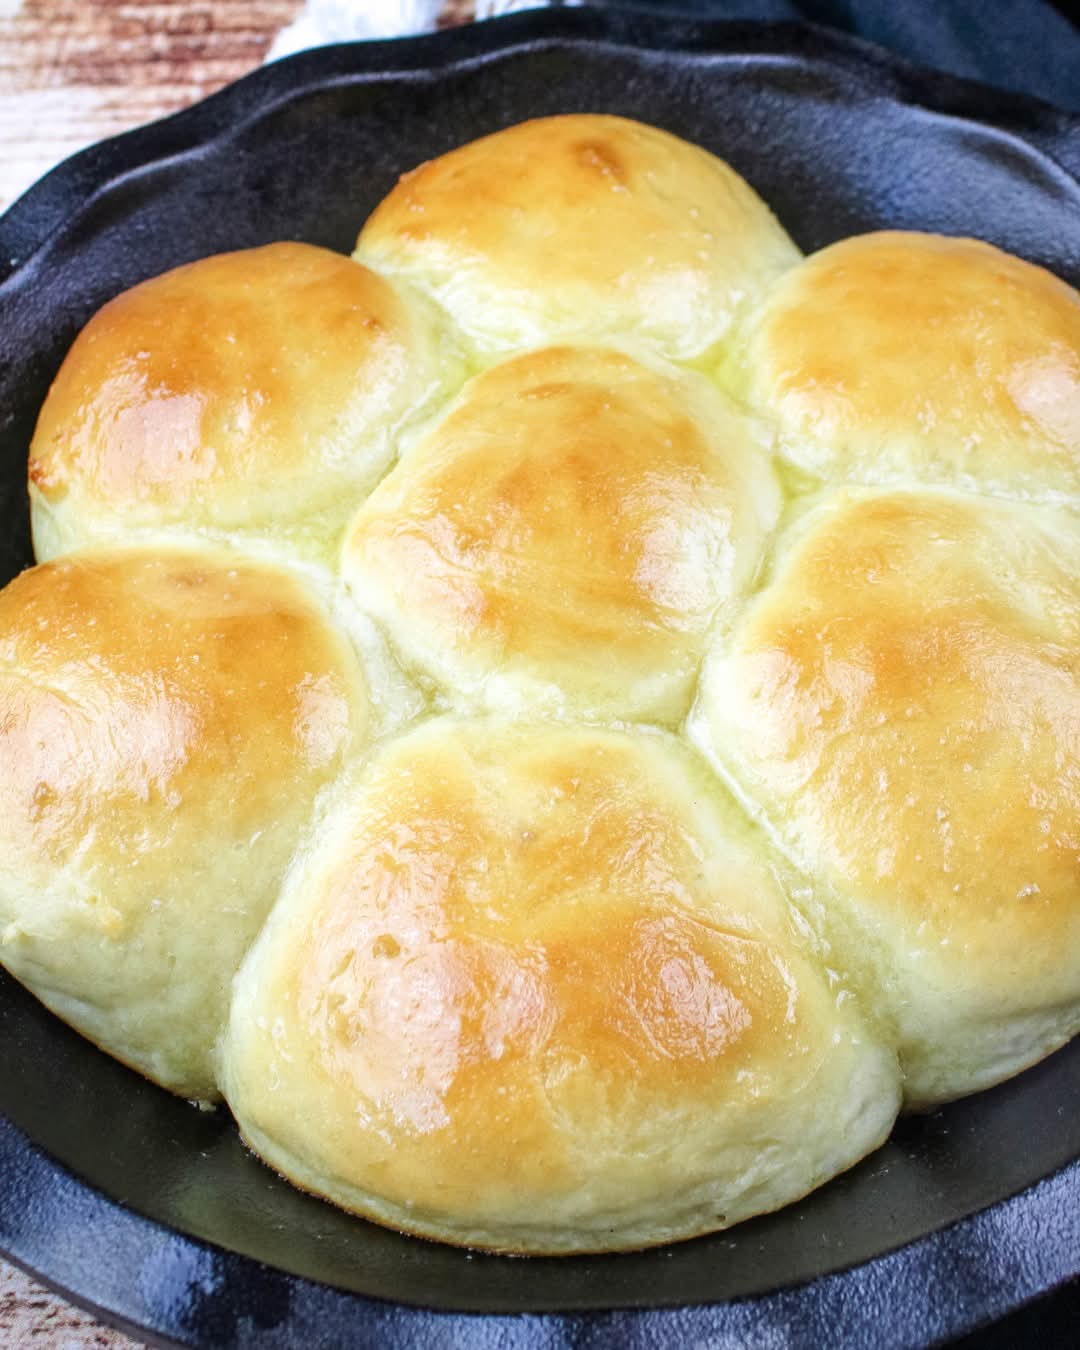
Description of the Final Result
These refrigerator rolls are incredibly soft, tender, and slightly sweet, with a rich buttery flavor that melts in your mouth. The interior is light and fluffy, while the exterior is delicately golden and just slightly crisp. They pull apart easily, making them perfect for serving at the table or enjoying warm with butter, jam, or honey.
Tips for Perfect Rolls
- Use the right water temperature:
Water that is too hot can kill the yeast, while water that is too cold may not activate it properly. - Don’t rush the refrigeration step:
Allowing the dough to rest in the refrigerator enhances both flavor and texture. - Avoid adding too much flour:
Too much flour can result in dense rolls instead of soft and airy ones. - Let the dough rise fully:
Proper rising time ensures light, fluffy results. - Use bread flour if possible:
It can give the rolls a slightly better structure and chew.
Common Mistakes to Avoid
- Skipping yeast activation (which can lead to flat rolls)
- Overkneading or underkneading the dough
- Not allowing enough time for the second rise
- Overbaking, which can dry out the rolls
Serving Suggestions
These homemade rolls pair perfectly with a wide variety of meals, including:
- Roast chicken or beef
- Soups and stews
- Holiday meals like Thanksgiving or Christmas dinner
- Breakfast spreads with butter, jam, or honey
They are also excellent for making mini sandwiches or sliders.
Why This Recipe Stands Out
- Make-ahead convenience for busy schedules
- Soft, bakery-quality texture at home
- Rich, buttery flavor
- Easy enough for beginners
- Perfect for both everyday meals and special occasions