Homemade Blackberry Jam – Easy, Natural & Full of Flavor
There’s nothing quite like homemade blackberry jam. Rich in flavor, naturally sweet with a hint of tartness, and made with just three simple ingredients, this classic jam recipe is perfect for beginners and experienced cooks alike. Whether you spread it on toast, swirl it into yogurt, or use it in desserts, this blackberry jam delivers pure, homemade goodness in every spoonful.
Making jam at home allows you to control the sweetness, avoid preservatives, and enjoy the true taste of fresh fruit.
Why You’ll Love This Blackberry Jam Recipe
- Only 3 Ingredients – Simple, natural, and affordable
- No Pectin Needed – Lemon juice does the job naturally
- Rich & Fruity Flavor – Perfect balance of sweet and tart
- Beginner-Friendly – Easy steps, no special equipment
- Versatile – Great for breakfast, desserts, and baking
Ingredients for Homemade Blackberry Jam
Main Ingredients:
- 4 cups fresh blackberries (washed)
- 3 cups granulated sugar
- 2 tablespoons fresh lemon juice
- Tip: Fresh lemon juice works best, but bottled can be used if needed.
How to Make Blackberry Jam (Step-by-Step)
Step 1: Prepare the Blackberries
Wash the blackberries thoroughly and remove any stems. Place them in a heavy-bottomed saucepan to prevent burning.
Step 2: Mash the Fruit
Using a potato masher or fork, gently mash the blackberries to release their natural juices. Leave some chunks if you like a textured jam.
Step 3: Add Sugar and Lemon Juice
Add the sugar and lemon juice to the pan. Stir well until everything is evenly combined.
Step 4: Bring to a Boil
Place the saucepan over medium-high heat. Bring the mixture to a rolling boil, stirring frequently to prevent sticking.
Step 5: Cook Until Thickened
Let the jam cook for 20–25 minutes, stirring often. As it cooks, the mixture will thicken and darken in color.
Step 6: Test for Doneness
Place a small plate in the freezer for a few minutes. Drop a little jam onto the cold plate and let it sit for 10 seconds.
- If it wrinkles when pushed with your finger, it’s ready.
- If not, cook for a few more minutes and test again.
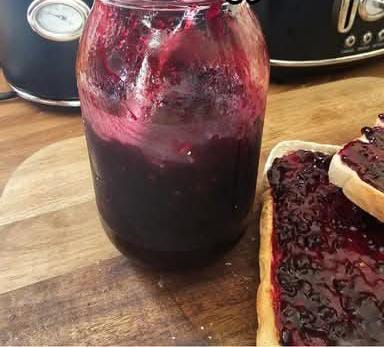
Step 7: Jar the Jam
Carefully pour the hot jam into sterilized jars, leaving a little space at the top. Seal tightly and let cool.
Storage & Shelf Life
- Refrigerator: Store for up to 3–4 weeks
- Freezer: Freeze for up to 6 months
- Water Bath Canning: Shelf-stable for up to 1 year when properly processed
Tips for the Best Blackberry Jam
- Stir constantly to avoid burning
- Skim off foam for a clearer jam
- Use ripe blackberries for maximum flavor
- Adjust sugar slightly if berries are very sweet or tart
Delicious Ways to Use Blackberry Jam
- Spread on toast, biscuits, or croissants
- Swirl into yogurt or oatmeal
- Fill cakes, cookies, or pastries
- Serve with cheese boards
- Glaze meats like chicken or pork
Variations to Try
- Seedless Blackberry Jam: Strain mashed berries before cooking
- Low Sugar Version: Reduce sugar and cook slightly longer
- Spiced Blackberry Jam: Add a pinch of cinnamon or vanilla
- Mixed Berry Jam: Combine blackberries with raspberries or blueberries
Frequently Asked Questions
Can I use frozen blackberries?
Yes! Thaw them first and include all the juices.
Why is my jam too runny?
It may need more cooking time or additional cooling—it thickens as it cools.
Do I need pectin?
No. Blackberries and lemon juice contain natural pectin.
Can I double the recipe?
It’s better to make jam in small batches for proper setting.
Final Thoughts
This homemade blackberry jam is simple, delicious, and incredibly rewarding to make. With just a few ingredients and easy steps, you can enjoy a classic preserve that tastes far better than store-bought versions.