Peanut Butter Lunch Lady Bars: The Ultimate Cafeteria-Style Treat
If you ever grew up eating school cafeteria desserts, chances are you remember those thick, soft, perfectly sweet peanut butter bars topped with creamy frosting and cut into generous squares. Peanut Butter Lunch Lady Bars are the ultimate nostalgic treat — rich, chewy, simple, and incredibly satisfying.
This classic dessert earned its name because it was often made in large sheet pans by school cafeteria “lunch ladies.” The recipe is designed to feed a crowd, making it perfect for potlucks, bake sales, family gatherings, or simply stocking your kitchen with a week’s worth of indulgent snacks.
Below is a detailed, step-by-step guide with tips, variations, storage advice, and everything Google loves in a complete recipe post.
Why You’ll Love These Peanut Butter Lunch Lady Bars
- Soft and chewy texture
- Rich peanut butter flavor
- Smooth, creamy frosting
- Easy pantry ingredients
- Perfect for feeding a crowd
- Great make-ahead dessert
These bars strike the perfect balance between sweet and salty, thanks to creamy peanut butter and a buttery base.
Ingredients
For the Peanut Butter Bars (Base)
- 2 cups all-purpose flour
- 2 cups granulated sugar
- 1 teaspoon baking soda
- 1 teaspoon salt
- 1 cup unsalted butter, melted
- 1 cup creamy peanut butter
- 2 large eggs
- ½ cup milk
- 1 teaspoon vanilla extract
For the Peanut Butter Frosting
- ½ cup unsalted butter, softened
- ½ cup creamy peanut butter
- 3 cups powdered sugar
- 3–4 tablespoons milk (as needed)
- 1 teaspoon vanilla extract
Optional Chocolate Topping:
- 1 cup semi-sweet chocolate chips, melted
Step-by-Step Instructions
Step 1: Prepare Your Pan
Preheat your oven to 350°F (175°C).
Grease a 9×13-inch baking pan or line it with parchment paper for easy removal.
Step 2: Mix the Dry Ingredients
In a large bowl, whisk together:
- Flour
- Sugar
- Baking soda
- Salt
Mix well to evenly distribute the leavening agent.
Step 3: Add the Wet Ingredients
In a separate bowl, combine:
- Melted butter
- Peanut butter
- Eggs
- Milk
- Vanilla extract
Whisk until smooth and creamy.
Slowly pour the wet mixture into the dry ingredients and stir until fully combined. Do not overmix.
Step 4: Bake
Spread the batter evenly into your prepared pan.
Bake for 18–22 minutes, or until:
- The edges are lightly golden
- A toothpick inserted in the center comes out clean
Do not overbake — this keeps the bars soft and chewy.
Let them cool completely before frosting.
Make the Frosting
Step 5: Cream the Butter and Peanut Butter
In a medium bowl, beat:
- Softened butter
- Peanut butter
Until light and fluffy.
Step 6: Add Powdered Sugar
Gradually add powdered sugar, mixing slowly to avoid a sugar cloud.
Add milk 1 tablespoon at a time until you reach a smooth, spreadable consistency.
Stir in vanilla extract.
Step 7: Frost the Bars
Spread the frosting evenly over the cooled bars.
If adding chocolate:
- Melt chocolate chips
- Drizzle over frosting
- Let set before slicing
How to Cut Perfect Bars
For clean slices:
- Chill the bars for 30 minutes
- Use a sharp knife
- Wipe the knife clean between cuts
Cut into squares or rectangles depending on your preference.
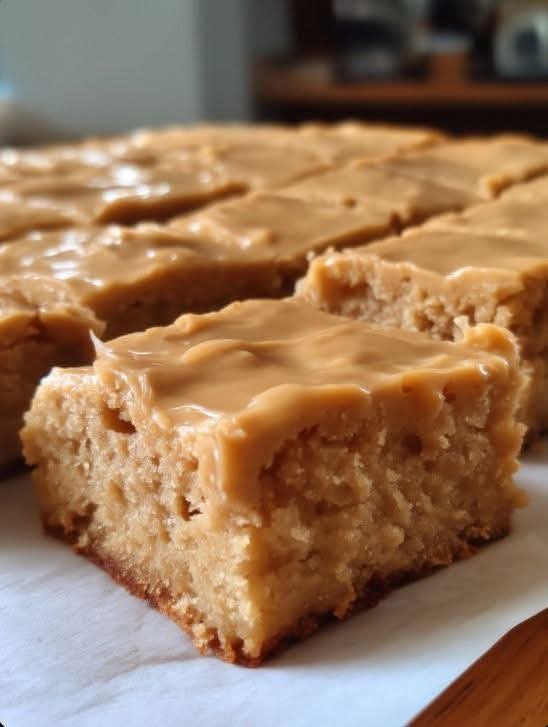
Texture & Flavor Profile
These bars are:
- Soft and tender
- Slightly dense but not heavy
- Rich in peanut butter flavor
- Sweet but balanced with salt
The frosting adds a creamy, melt-in-your-mouth finish that makes these irresistible.
Storage Tips
- Store at room temperature in an airtight container for up to 4 days
- Refrigerate for up to 1 week
- Freeze (unfrosted or frosted) for up to 3 months
To freeze:
- Wrap tightly in plastic wrap
- Place in freezer-safe container
Thaw at room temperature before serving.
Variations You Can Try
1. Chocolate Peanut Butter Bars
Add ½ cup cocoa powder to the base and reduce flour slightly.
2. Peanut Butter Oat Bars
Replace ½ cup flour with quick oats for texture.
3. Crunchy Peanut Butter Version
Use crunchy peanut butter for added bite.
4. Salted Peanut Butter Bars
Sprinkle flaky sea salt on top of frosting.
Pro Baking Tips
- Use room temperature eggs for better mixing
- Don’t overbake — they continue cooking as they cool
- Line your pan for easy lifting
- Use high-quality peanut butter for best flavor
Frequently Asked Questions
Can I use natural peanut butter?
Yes, but stir it very well before using. The texture may be slightly softer.
Can I make these gluten-free?
Yes — substitute with a 1:1 gluten-free flour blend.
Can I make them ahead of time?
Absolutely. They actually taste better the next day!
Final Thoughts
Peanut Butter Lunch Lady Bars are the perfect combination of nostalgic comfort and crowd-pleasing flavor. They’re easy to make, require simple ingredients, and deliver big on taste. Whether you’re baking for a party, family dessert, or just craving something sweet and peanut buttery, these bars will never disappoint.